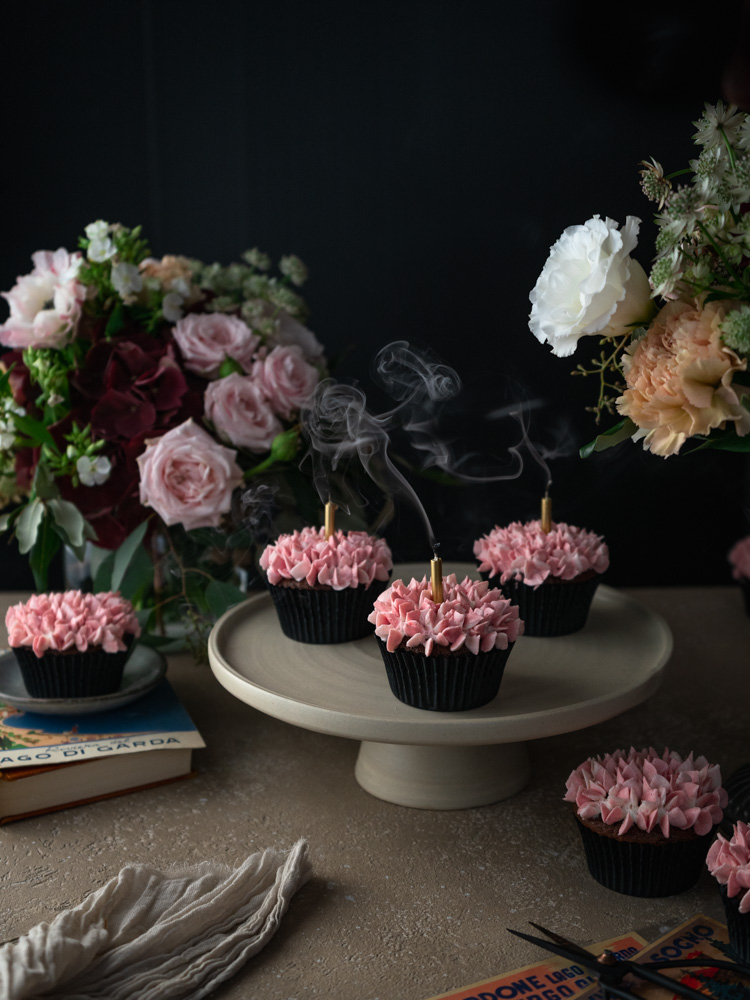
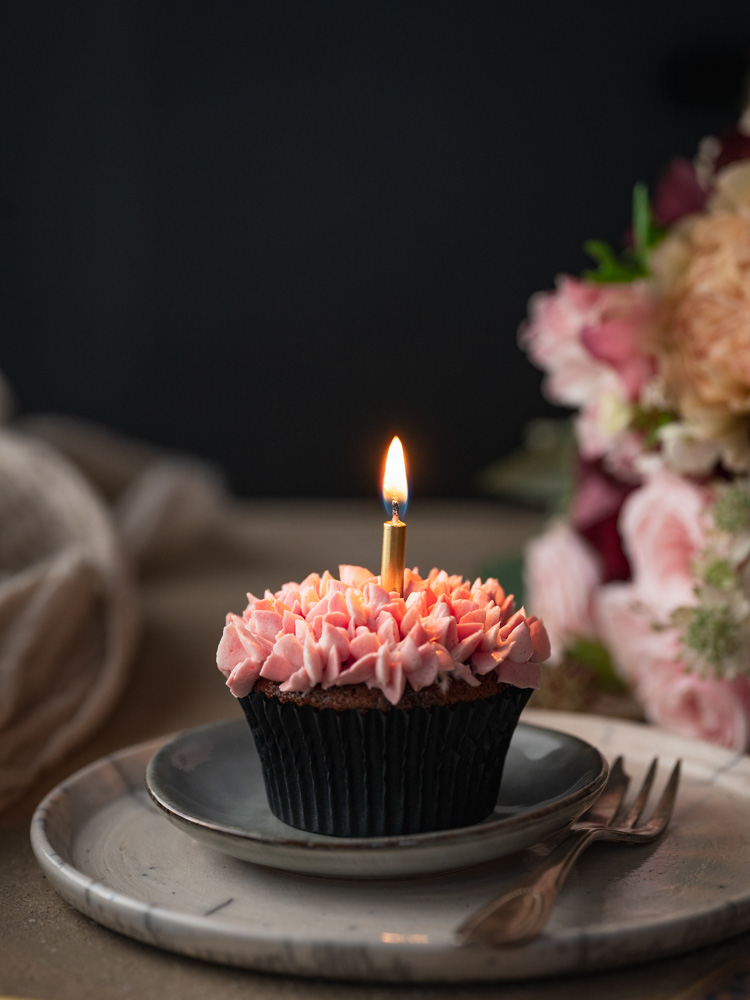
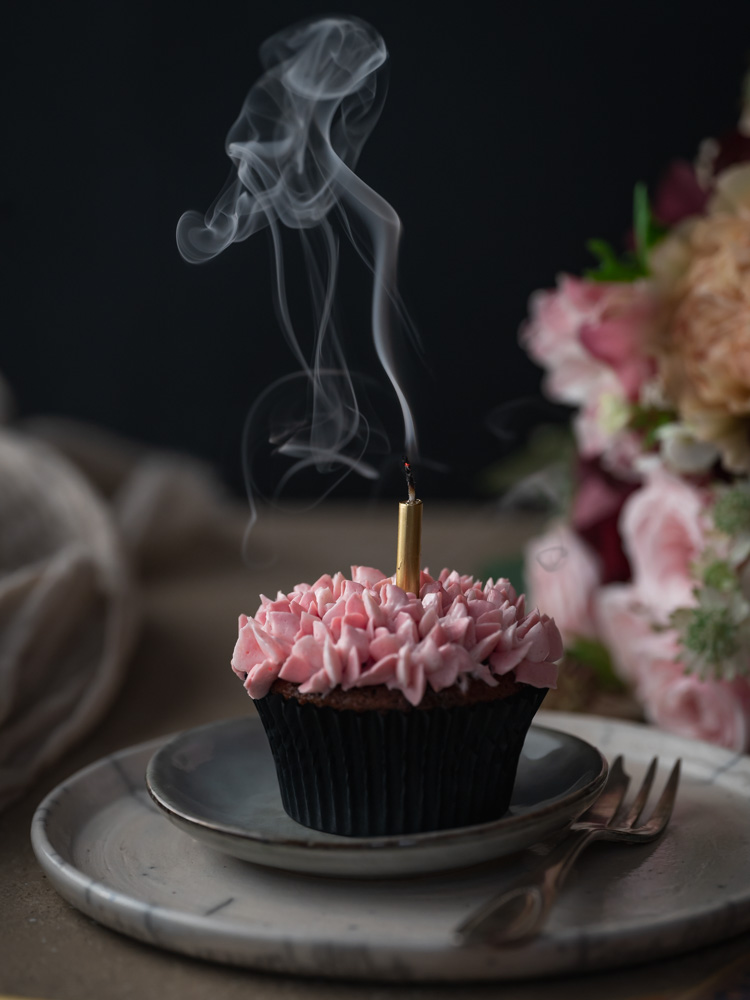
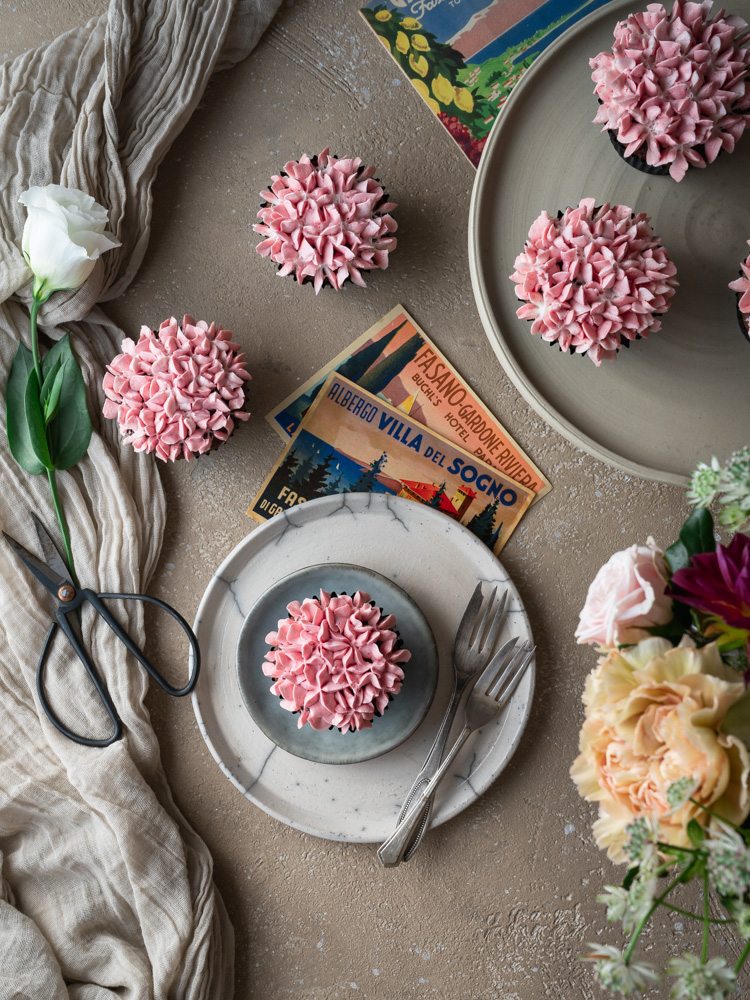
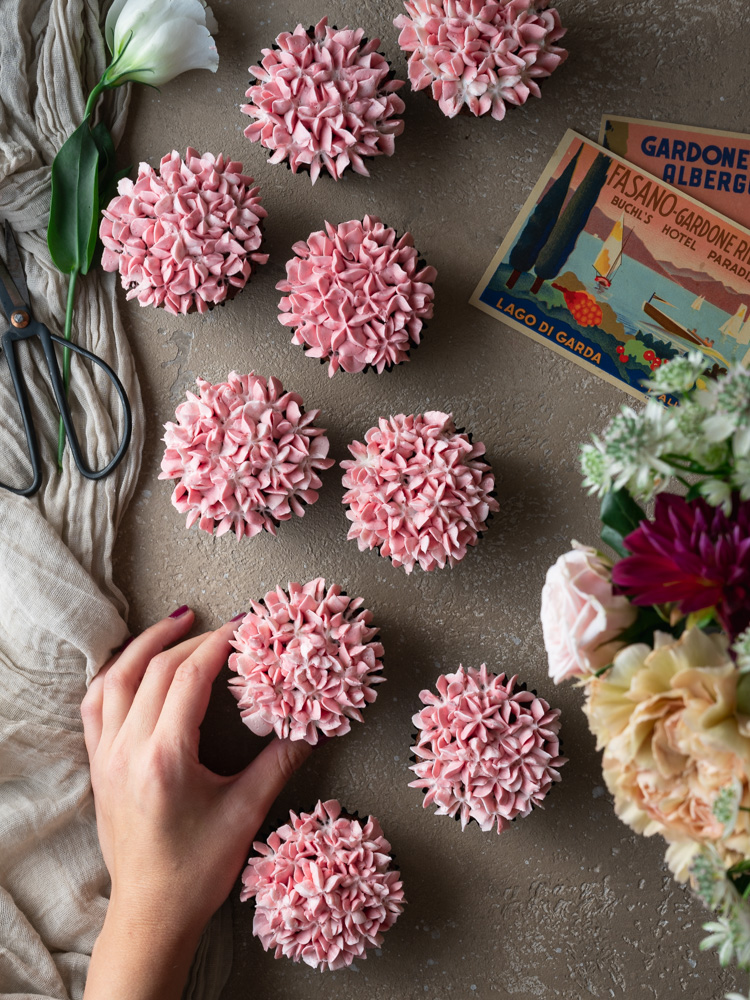
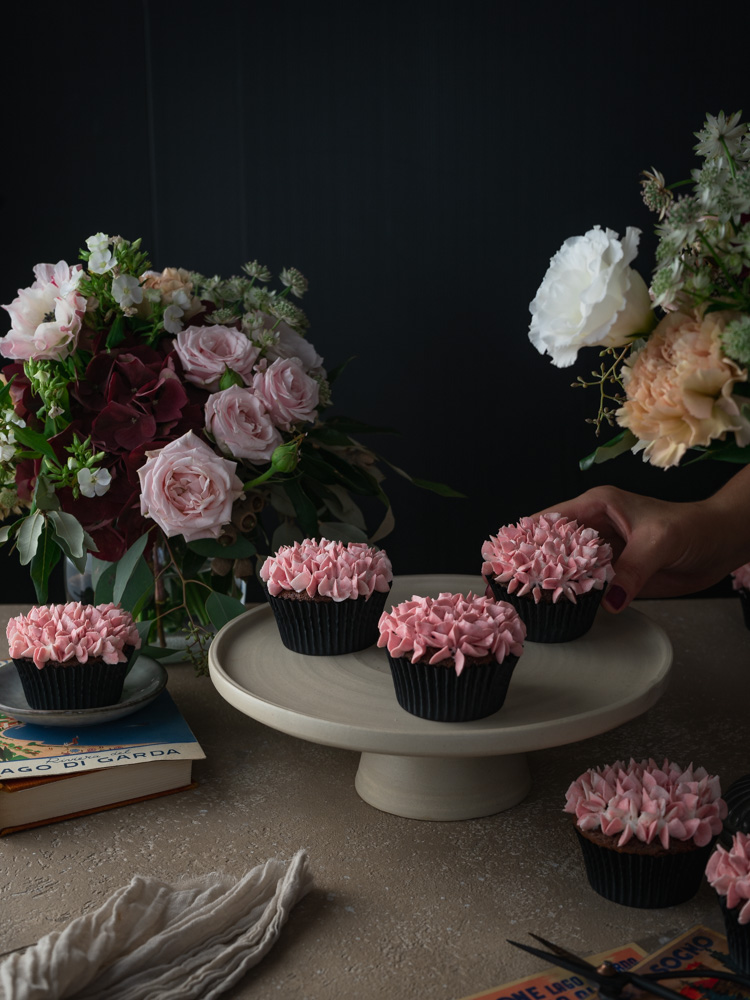
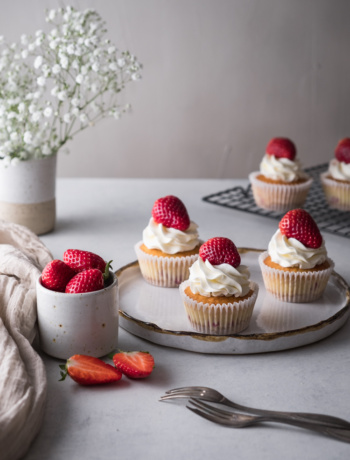
 I really enjoy decorating cupcakes, and I probably would do it more often if that doesn’t imply eating a great deal of buttercream. But look at these lovely hydrangea cupcakes, aren’t they the cutest? And what about those vintage, and rare, postcards from the Italian Belle époque?
If you don’t already know, I live in the north of Italy in a small town called “Gardone” situated in the Garda Lake region, which was very popular during the early nineteenth century, and at that time tourists sent postcards from the beautiful places that they visited. Postcards were souvenirs, as well as a sort of advertisement as they boasted the amenities of an establishment. Luckily enough my boyfriend likes to collect them and he allowed me to use them as props for my photographs.
-ITALIAN VERSION-
CUPCAKES AL CIOCCOLATO CON FROSTING AL LAMPONE – DECORAZIONE ORTENSIA
Mi diverto tantissimo a decorare i cupcake, è una cosa che farei anche molto più spesso ma poi dovrei mangiare quantità industriali di dolci, e soprattutto di crema al burro. Guardando questi deliziosi cupcake decorati come se fossero un fiore di ortensia penso possiate capire anche voi il fascino del creare una decorazione con la sac a poche. E cosa ne dite invece delle bellissime cartoline che appaiono in foto? Forse non lo sapete ma io vivo sul lago di Garda, più precisamente a Gardone Rivera che negli anni ’20 del Novecento era una rinomata località turistica. Queste cartoline di viaggio, vintage e anche di una certa rarità, sono una vivida testimonianza dell’atmosfera incantevole e sognante del periodo della “belle époque”. La mia fortuna è quella di avere un collezionista in casa che le recupera un po’ da tutto il mondo, a volte anche dall’America, e che gentilmente mi ha concesso di utilizzarle come oggetti di scena in questi scatti. Non le trovate anche voi bellissime?
Ingredienti
Per i cupcakes al cioccolato
Per 12 cupcakes
120 g farina autolievitante
120 g zucchero semolato
60 ml olio di cocco, o altro olio vegetale (o 120 g di burro)
2 uova medie
1/2 cucchiaino di bicarbonato
25 g cacao amaro in polvere
80 ml latte di kefir
10-15 g gocce di cioccolato fondente
estratto di vaniglia
un pizzico di sale
Per la crema al burro
150 g zucchero semolato
2 chiare d’uovo
170-200 g burro morbido
estratto di vaniglia
qualche goccia di aroma lampone
qualche goccia di colorante alimentare rosso o rosa, in gel
Procedimento
-
Far sciogliere in un pentolino l’olio di cocco, se si trova allo stato solido, e lasciarlo raffreddare.
-
In una ciotola (o nella planetaria) porre tutti gli ingredienti e lavorare l’impasto per 1-2 minuti.
-
Riempire i 12 pirottini di carta e cuocere in forno statico preriscaldato a 175° per circa 20-22 minuti. Lasciar raffreddare.
-
Per la crema al burro cominciamo preparando la meringa svizzera.
-
Mescolare gli albumi con lo zucchero in una ciotola di alluminio e porla a bagno maria sopra una casseruola con acqua bollente. Continuare a mescolare finché tutto lo zucchero non si è disciolto (controllando con le dita non dovrete più percepire granelli di zucchero)
-
Trasferire gli albumi con lo zucchero in una planetaria e montare per circa 5-10 minuti finché la ciotola non risulterà fredda al tatto.
-
A questo punto possiamo cominciare ad aggiungere un pezzettino alla volta il burro morbido. E’ importante avere pazienza in questa fase e non aggiungere il burro tutto insieme.
-
Continuare a montare fino al raggiungimento della giusta consistenza. Se a un certo punto la consistenza dovesse sembrare granulosa, non temete e continuate a montare. Infine aggiungere qualche goccia di aroma naturale lampone, e di colorante in gel fino ad ottenere la tonalità desiderata.
-
Trasferire la crema al burro in una sac a poche con punta a stella chiusa (Wilton 2D) e decorare semplicemente creando dei ciuffetti che avranno la forma di fiorellini. Potete partire dal centro, oppure dal lato più esterno, entrambe le tecniche sono valide, dipende da come vi trovate meglio, ad ogni modo il suggerimento è quello di applicare pressione e poi allontanarsi in modo deciso una volta creato il ciuffetto.
-
Potete anche preparare diverse gradazioni di rosa, rimpiete poi una tasca da pasticcere con la creama al burro di un colore, e un’altra tasca con un altro colore, infine unite le 2 tasche in una più grande,così da ottenere un effetto striato. Oppure potete anche mettere tutti i colori nella stessa sac a poche, in questo caso dovrete fare attenzione a tenerli divise creando delle strisce di crema colorata una a fianco all’ altra.
DARK CHOCOLATE PUMPKIN FROSTING CUPCAKES
 (No Ratings Yet)
 Loading...
Ingredients
- FOR 12 CHOCOLATE CUPCAKES
- 120 g self-raising flour
- 120 g caster sugar
- 60 ml coconut oil or other vegetable oil (o 120 g di burro)
- 2 eggs
- vanilla extract
- pinch of salt
- 1/2 tsp baking soda
- 25 g cocoa powder
- 1 o 2 tbsp milk
- FOR THE SWISS MERINGUE BUTTERCREAM
- 150 g caster sugar
- 2 egg whites
- 170-200 g soft butter
- vanilla extract
- few drops raspberry natural flavor
- few drops food coloring gel, red or pink
Instructions
1
In a bowl slightly mix the eggs with the coconut oil.
2
Add the sifted flour with cocoa powder, salt, and baking soda, and sugar
3
Beat the batter for about 1-2 minutes. Add 1 or 2 tablespoons of milk.
4
Divide the batter into a 12-cups muffin tin lined with paper cases (¾ full).
5
Bake in a preheated oven at 175° for about 20 minutes. Let them cool completely.
6
Let it cool and strain it with a sifter to make it as smooth as possible.
7
For the swiss meringue, place all the ingredients over a double boiler, stirring constantly.
8
Once the sugar is completely dissolved (around 9 minutes) you can remove the mixture from the heat and transfer it to a stand mixer with a balloon whisk attachment.
9
Start whisking and whip at high speed until glossy, about 5 minutes. The bowl should be cold to the touch.
10
Now you can add the butter, a little piece at a time until it is completely incorporated.
11
The butter should be softened but still slightly cold.
12
Once all of the butter has been added, crank the mixer back up to high to beat the buttercream.
13
The buttercream can become soupy, don't give up just keep whisking it and it should become smooth, fluffy, and creamy.
14
If it is too runny, just place it into the refrigerator for 10 minutes, and whisk again.
15
Mix in a few drops of raspberry flavor and a few drops of red/pink food coloring gel.
16
transfer it into a piping bag with a close star nozzle (Wilton 2D) and decorate your cupcakes.
17
You can also color the buttercream with 2 or 3 different shades of pink to have to get a good color match to the real hydrangea. Fill your piping bag with the 2 (or 3) colors of frosting, side by side.
18
To make the hydrangea shape, piped large and loose flower shapes. You can start from the edge of the cupcake, and then filled in the center, or also the other way around, both work well.
DARK CHOCOLATE PUMPKIN FROSTING CUPCAKES
(No Ratings Yet)Ingredients
- FOR 12 CHOCOLATE CUPCAKES
- 120 g self-raising flour
- 120 g caster sugar
- 60 ml coconut oil or other vegetable oil (o 120 g di burro)
- 2 eggs
- vanilla extract
- pinch of salt
- 1/2 tsp baking soda
- 25 g cocoa powder
- 1 o 2 tbsp milk
- FOR THE SWISS MERINGUE BUTTERCREAM
- 150 g caster sugar
- 2 egg whites
- 170-200 g soft butter
- vanilla extract
- few drops raspberry natural flavor
- few drops food coloring gel, red or pink
Instructions
In a bowl slightly mix the eggs with the coconut oil.
Add the sifted flour with cocoa powder, salt, and baking soda, and sugar
Beat the batter for about 1-2 minutes. Add 1 or 2 tablespoons of milk.
Divide the batter into a 12-cups muffin tin lined with paper cases (¾ full).
Bake in a preheated oven at 175° for about 20 minutes. Let them cool completely.
Let it cool and strain it with a sifter to make it as smooth as possible.
For the swiss meringue, place all the ingredients over a double boiler, stirring constantly.
Once the sugar is completely dissolved (around 9 minutes) you can remove the mixture from the heat and transfer it to a stand mixer with a balloon whisk attachment.
Start whisking and whip at high speed until glossy, about 5 minutes. The bowl should be cold to the touch.
Now you can add the butter, a little piece at a time until it is completely incorporated.
The butter should be softened but still slightly cold.
Once all of the butter has been added, crank the mixer back up to high to beat the buttercream.
The buttercream can become soupy, don't give up just keep whisking it and it should become smooth, fluffy, and creamy.
If it is too runny, just place it into the refrigerator for 10 minutes, and whisk again.
Mix in a few drops of raspberry flavor and a few drops of red/pink food coloring gel.
transfer it into a piping bag with a close star nozzle (Wilton 2D) and decorate your cupcakes.
You can also color the buttercream with 2 or 3 different shades of pink to have to get a good color match to the real hydrangea. Fill your piping bag with the 2 (or 3) colors of frosting, side by side.
To make the hydrangea shape, piped large and loose flower shapes. You can start from the edge of the cupcake, and then filled in the center, or also the other way around, both work well.
No Comments